Showing posts with label FOs. Show all posts

Wednesday, January 13, 2010

Finally, a Sweater!

I nearly forgot how gratifying it feels to actually finish a knitting project! But it feels awesome! Last night I casted off my Rena Cardigan. How many months has it been since I could say that I casted off of a big project??!


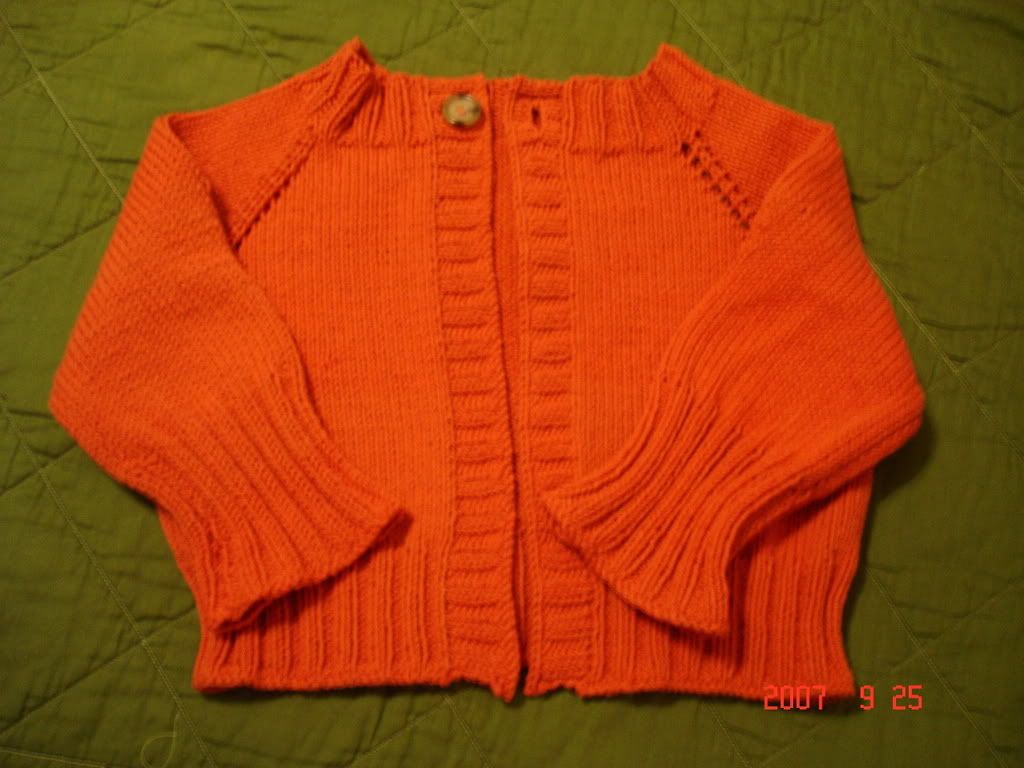
It has a few quirks that I will likely go back and tweak, but I must say that I am really satisfied with the results. My intention was to knit a very neutral, wear with anything, comfortable cardigan. As far as I'm concerned, mission accomplished! The inspirational piece can be found here on Fossil's website.

When I started this sweater back in August, I almost immediately got hit with knitting obstacles (my way of saying "no time for knitting") and eventually it was shoved into one of my many yarn baskets to await the day when I would finally pull it out and finish it. To be honest, somewhere between Halloween and Thanksgiving, my interest to complete it was almost nonexistent. I'd hit a wall from being worried I wouldn't have enough yarn in my dyelot to finish and the knitting itself began to feel monotonous and never-ending. Essentially, I gave up on the sweater. I guess it's easier to admit that now that it is actually complete. Nobody wants to say they gave up on something that they were so excited about!


But inevitably, I got bitten hard once again by the knitting bug. I guess when you truly love something, you may stray but you always go back to it. Hence my urge last Saturday to pull it out of the basket, and over the next few nights, it was all done!


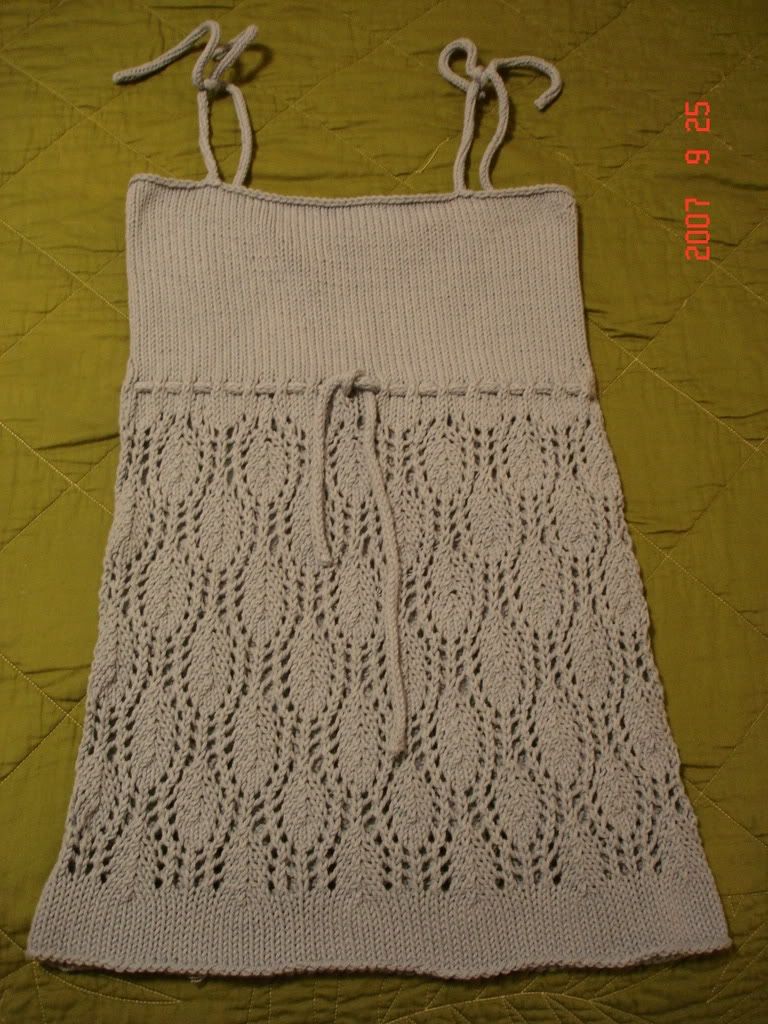
I am so excited to share my work that I'll settle for the photos I took during the last few minutes of daylight this afternoon.


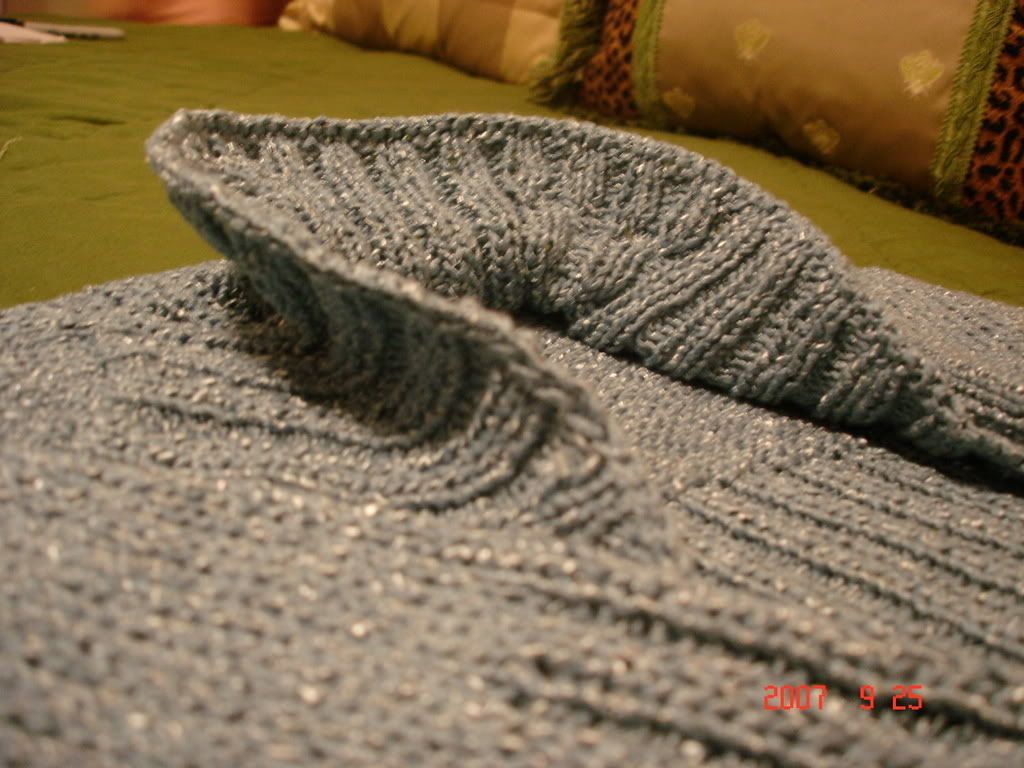
As you can see in the above photo, the rolled edges of the collar are rolling in just a bit too much. I believe that a little more blocking should help with that. Also, there are a couple of stitches around the edge where I picked-up to knit the collar that got a little too stretched out. I will probably go back and reinforce them slightly. It was quite a task to pick up all of those stitches and have them on the needle at one time!


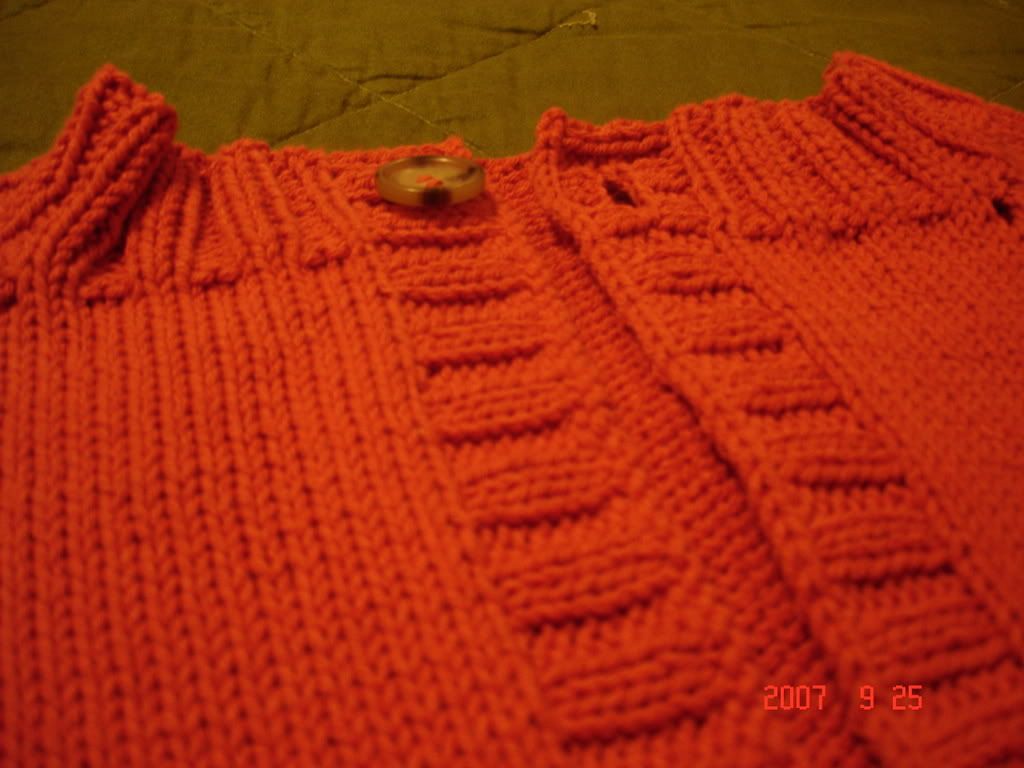
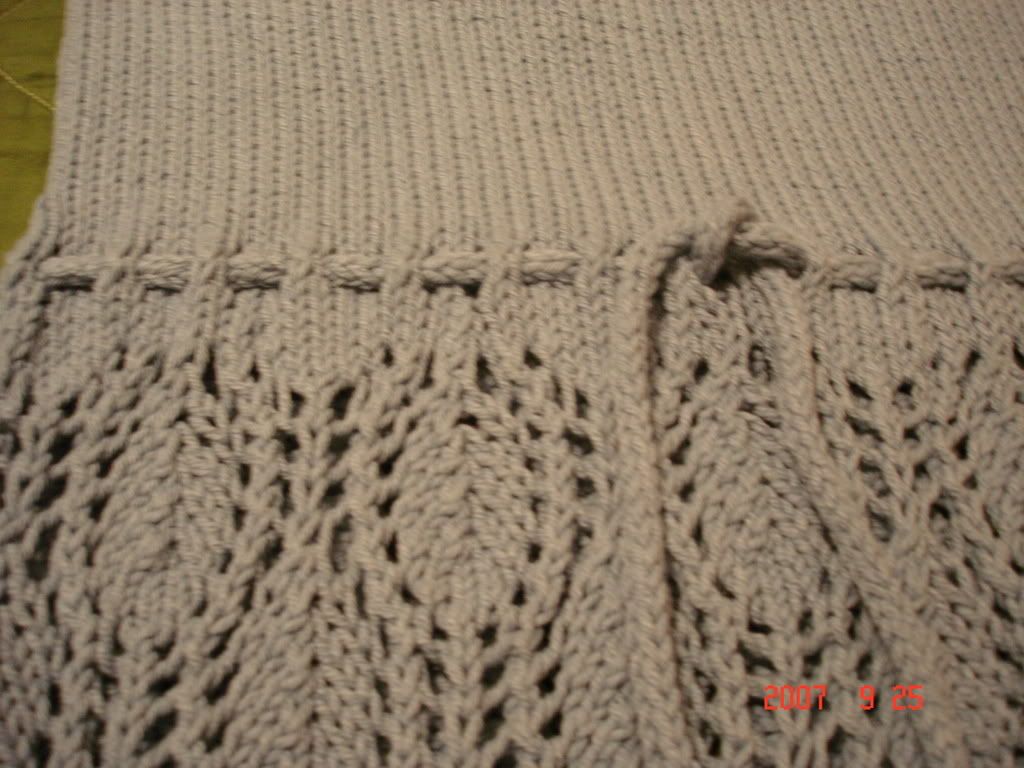
In this photo of the back, you can see where my seam looks crooked. This was frustrating, because I ripped and re-seamed half a dozen times before I realized that it would always appear crooked. This is because the eyelets are two different sizes on either side of the ridge. That's what I get for wanting a reverse stockingette stitch background with yarn-overs! I guess it's a good thing I've let my hair get so long - it will cover the seam up!!


As for the construction, it went much like my September sweater (check my labels to the right). I absolutely love putting something together in a non-traditional way! First, I casted on at the elbow of one sleeve and knit up to the shoulder. I casted on stitches at either side for the front and back yokes. I did a tiny bit of neck shaping and knit to the center of the back. I wanted this sweater to have a seam there (a fact I now regret a teeny bit due to the aforementioned crookedness). Then I knitted a second sleeve exactly the same way. Next I sewed both pieces together. Then stitches were picked up for the bottom and lastly, for the collar. If only it went as quickly as the explanation!!

Details:

  • Yarn: Lion Brand Cotton Ease in Stone; 3.5 balls
  • Needles: US 6,7,8
  • Time: Sometime in August - January: way too damn long!

Well, that's all for now. I took pretty good notes while knitting this baby and once I organize them, I'll likely share them in the form of a tutorial. I don't know why I recoil from the idea of writing a bona fide pattern. I think my brain just rejects all the math involved in sizing. It's enough for me to keep up with calculating gauge :)

I'm already planning on a little somethin' to cast on tonight! Ha!
I guess I've got it bad!!


Sunday, March 8, 2009

What a Ride!

After spending most of Saturday sitting at my sewing machine, I am happy to announce that my newest baby, the Quirky Queen Cardigan is complete! The journey of this sweater has been the most enjoyable knitting experience I have had to date. Knitting is definitely a hobby that hasn't ceased to excite me after over four years. It just keeps getting more fun!! Here she is:


The idea for this sweater came from one of my favorite sources of inspiration, Anthropologie. When I had first seen it in the fall of 2008, I hadn't been drawn to it. When I saw it on Grey's Anatomy, I fell in love.

The design process turned my brain a little wacky for a few days, which might be why I decided to start knitting at the waistband. I measured the smallest part of my waist and knitted a simple six stitch cable until it measured just a bit shy of my size. I allowed two purl stitches on either side for selvedge. Then it was back to the drawing board. The fact that this sweater is almost seamless wasn't a design element, it just happily turned out that way! I did some measuring, picked up stitches around the edge of my waistband and began knitting the top portion. I separated the front from the back when I reached the armholes and knit the back first, then each front.

I had a hard time deciding what to do for the peplum of the sweater, so I settled for a 2 x 2 rib. I felt a little defeated at the time that my brain was a bit too fried to come up with something more creative, but in hindsight, I am most happy with that choice.

It was also pretty difficult to come up with the collar I wanted, so I designed that portion while I was knitting it. I probably could have done a better job with it by doing short rows instead of m1 increases, but it's good enough for me. Besides, short rows confuse me!


The sleeves were easy, which I only thought then because I had thrown my reservations out the window by the time I knit them, again an "on the fly" design. I scribbled down my stitch numbers and decreases only so that I could replicate them on the second sleeve. I probably should have taken the time to analyze what I was doing a little better, because they didn't come out exactly the way they were supposed to. I knew I wanted a puffed sleeve, but even after sewing the pleats, they are a little too loose. I might go out and get some smaller coverable buttons and make another pleat at the bottom edge and attach a button, but I'm not sure if the sleeves bother me enough to go to the trouble.
I seamed the sleeves and set them in with my sewing machine only after I attempted to do it by hand. I won't say it was any easier, but it was definitely quicker and produced a better look. Sewing the knitted fabric by machine is a bit trickier than it may seem.
By the way, her name is largely a result of the season of her birth, Mardi Gras, which has a lot of royal themes. I had thought she would be ready right around Fat Tuesday, but me and deadlines are not great friends!

Somewhere along the ride, I realized that the sweater I was knitting didn't look anything like the eclectic Sylvan Scene by Leifsdottir sweater that inspired it. I doubt I could have ever replicated it exactly, but that's why it was such fun - for the first time, it seems more like my design. Well, if you forget that I copied the idea of the big buttons and knitted loops.


Here is a (terrible) shot of the back:


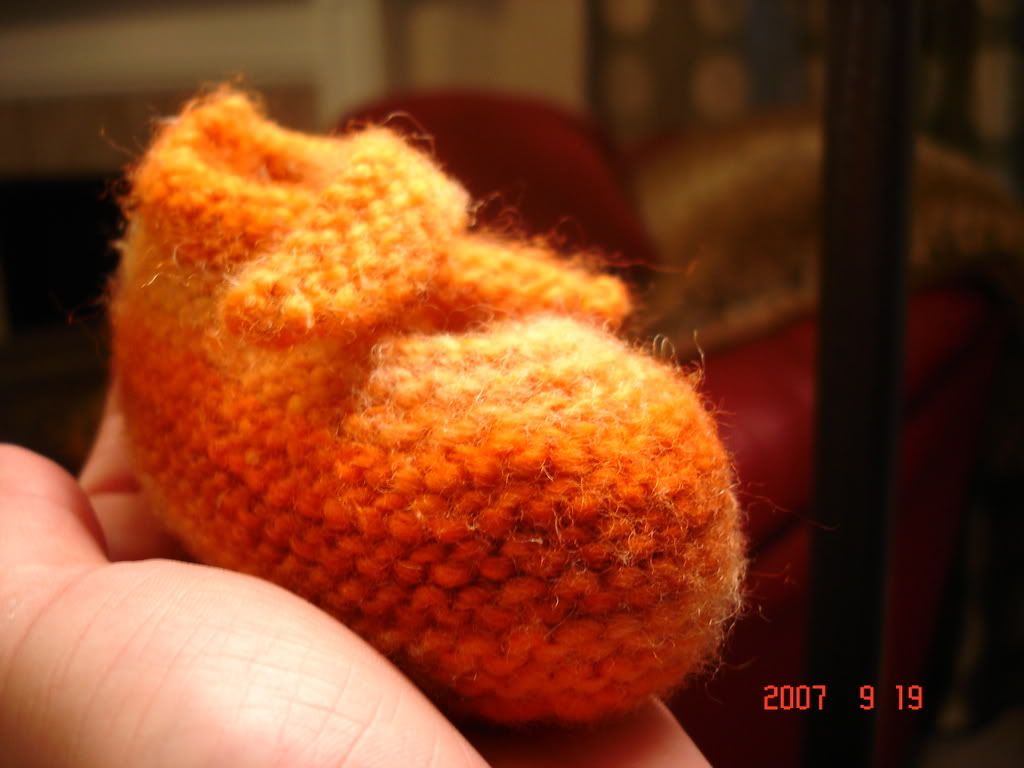
Here's where I reinforced the buttons and loops from the inside:


My husband was like, "that looks raggedy", with a confused look on his face, when he saw what I had sewn on the inside of the sweater. Obviously the man didn't realize that it was exactly the vintage look I was going for. Besides, this Queen has her Quirks! Sometimes men are so clueless! Anyway, here's a shot of the tag I made for it:


I played around with it, and I will probably add an applique' or some other kind of embellishment. I need to get some custom tags made...

Anyway, the Queen is ready enough for her debut, and that will probably happen tomorrow at my office. There's no telling what some of the clueless guys I work with will have to say about it (or what their looks might say). Maybe it will be good enough to write about....!

;-)

Monday, January 12, 2009

Updates

I guess I wasn't kidding when I swore that Bianca was my last FO for 2008. At least it was the last I'd blog about. I did whip out a baby blanket and beret for a couple of Christmas gifts, but I was too caught up in the madness to take proper photos and share them. Oh well!


My family had an awesome Christmas, and as always, once I finally allowed myself to stop fretting over shopping, I enjoyed it to the max! I know that these precious years of us having young kids who still believe in every bit of the magic are limited to a handful - and I don't want to remember them being stressed!


Now that the holidays are over and I have officially settled in to the new year (thank goodness my kids are back in school!), I have had a hard time lately coming up with something that I am craving to knit. This seems silly, but I almost feel like I am letting myself down if I knit something that a ton of other knitters have done, and more than likely done better than I could hope to. I feel like I spent all of fall being in a knitting frenzy, as I hardly got going on one project before I was already planning the next. Maybe that's why now I feel like I'm in a slump. I'm also trying to force myself to come up with something practical that I'll wear over and over. I am absolutely open to suggestions, anyone?!


Despite the fact that we have had ridiculously high temps for this time of year, even in Mobile AL, I have decided that I would love to finally knit a hoodie. I'm pretty sure that I have decided on the Pebble Hoodie from Knitscene winter 07/spring 08. Of course, I already have several mods in mind (cables??). I came across this sweater (ravelry link) that sold me on the idea.


Altough I've had a rough time committing to a large project, my needles have definitely not been idle! I knitted a third Gretel, in Plymouth Tweed:


I'm not exactly thrilled with the yarn I chose. Actually, I'm not thrilled with the way it photographs. It looks so much better in person. Tweed is difficult to knit precise cables, I've found. But after knitting this hat twice previously, I knew that I wanted something a little more casual. I couldn't bear to look at this yarn for another moment without knitting something!


Well, I'm off to bed to do a little reading before I stay up too late. More news soon ~ and hopefully some progress shots!

Monday, December 8, 2008

Bianca, Complete!

I am so happy to finally be finished with this sweater! I got absolutely nothing accomplised yesterday aside from putting Bianca together. I was so excited that I even wore it today! It was surprisingly warm for this 38-degree morning.

I have to admit that I didnt' realize what I was getting myself into when I decided I could re-create the Lucy sweater from the Fossil Holiday 2008 catalog. The knitting itself was not difficult. But, first I had to take measurements and use them to calculate gauge - without the inspirational sweater, then draw a schematic, and improvise throughout. My head spun a couple of times!

First, I had a hard time figuring out how to get the hems to stand out from the rest of the knitting. In hindsight, accomplishing this was definitely easier and less time consuming than the method I chose. Initially, I knitted a very tight garter stitch for the hem but it looked way too homemade. I hated it by the time I was done knitting the back piece. So, I ended up doing a psuedo-steeking exercise to get them just right. There was something very horrific about cutting into my knitting, but the seams I sewed in (by machine) worked just fine. I even went back and sewed them two more times to be sure I wouldn't unravel!


As for the fit, I could be a little happier. I don't know whether to blame it on the mediocre yarn or the amount of cables, but the sleeves didn't block out as much as I would have liked. They are a bit tight - but I'm hoping they'll stretch. Maybe I'll use a little steam? It also annoys me that the edges of the button band tend to curl inward, and the side seams aren't laying flat enough. Again, I think steaming may help.


Aside from those few peeves, I love the sweater. It turned out almost exactly the way I wanted. And best of all - I had fun knitting it! My first thought was to knit it in some gorgeous Plymouth Tweed I have, but for some reason, I couldn't vision this sweater being tweed. Besides, I'd much rather stare at the skeins of yarn I already own than knit with it. That almost makes as much sense as buying yarn when I have plenty stuffed in various places around my home!!

The details:

  • Yarn: Patons Classic Wool (merino is missing on the label); almost 5 skeins; dark gray mix
  • Needles: US 7 for the body & US 6 for the hems/button bands
  • Began November 17, ended December 8 (took almost a week off for Thanksgiving)

Do you see that eerie blue glow? I forgot to turn the tv off.


I must say that after spending an hour taking photos, I have got to figure out how to take better indoor pictures on my digital camera. It does great outdoors in natural light and when I use the flash indoors, but the flash completely destroys the the colors and fine details. I've seen so many great pics taken with the same Canon Powershot I have on the Flickr group for this camera. I need to learn! Note to self: New Years resolution!


This will most likely be my last sweater for the year. Even though I don't have any knitted gifts planned, I really need to start applying myself to shopping......of course, I could always whip out a project with the aforementioned Plymouth Tweed.....

Monday, December 1, 2008

September Sweater Tutorial, Complete!

Please be advised that this was composed from pages of scribbled notes (I'll do better next time, promise!). I tried to proof to make sure it made sense, but it may look like absolute gibberish.

I can make a "free Ravelry download", just don't have the time at the moment.


If you have questions, feel free to drop me a line.
Contact me:
stepheely@aol.com
Ravelry

September Sweater


Preface:
I am not a paid designer. I knit purely for enjoyment! I have never written a pattern with the intention of anyone using it besides myself. However, I had such a response on Ravelry from people who wanted to knit this sweater that I decided to try to organize my notes and come up with guidelines by which to knit something similar to it. I’ll include the cable patterns I used (on the last page), but I don’t remember exactly how I worked the decreases into the cable pattern around the neck area, so I’m leaving you to be creative and pick your own cables.
I will be happy to try to answer questions via my message box on Ravelry, but I can’t be an over-the-shoulder coach! For me, figuring out the quirks and researching to learn new techniques is part of the fun of knitting.

Notes on Construction:
This sweater offers unusual, but simple construction. It is knit sideways starting at the left sleeve. Stitches are then cast on either side of the sleeve to account for the yoke. Then, stitches are decreased to knit the right sleeve. The most confusing part (for me) is casting off and shaping the neck area.
Once the yoke and sleeves are complete, sections are picked up and knit to form the back and fronts. Then, the collar and button bands are picked up and knit last. There is very little seaming involved, but the picking up of stitches creates a type of seam that gives the sweater structure.

Materials
*2 skeins of Lion Brand Fisherman’s Wool – or any other worsted weight yarn that will block nicely (blocking is important for this sweater)

*US size 7 (4.5mm) circular knitting needles

*Whatever materials you use to block – I use big beach towels, a windex bottle full of water, and a bunch of straight pins

*Darning needle

Gauge:
4 sts/inch – the gauge of the rows is not so important, since you will be measuring the length as you go.

Begin at Left Sleeve:
CO 100 sts
Work 2 inches in 2x2 rib
Cable set-up row
Work in pattern for 6-7 inches (or however long you want the sleeve to be).


Adding stitches for yoke:
Using the cable method, cast on 20 sts at the beg of next two rows.
Work cable set-up row – work to match cable pattern on sleeve.
Take the time to recognize how the sweater is already shaping up. Your left sleeve is complete and if you are looking at the RS of the work, the stitches on the left hand side are the front of your sweater and the stitches on the right hand side are the back.

Work in pattern until the piece measures 4.5-5.5 inches from the newly casted on yoke sts. (depending on your bust)

Next row (RS): work 71 sts and join new ball of yarn. Cast off 6 sts for neck, work to end of row. At this point, the back and left front sections are separate, and should be worked separately.
Next row (WS): work all sts in patt until last 2 sts, p2tog. Making sure you keep sts separate, work across the back sts.
Next row: work in patt across
Next row: work in patt, repeating the same decrease for neck as last RS row.
Now you will only work the sts on the front. The back sts will be worked later.
Next row: Repeat decrease at neck on EVERY row. RS rows decrease at beg of row, WS rows decrease at end of row. Work four more decreases – 6 total sts have been decresed at neck. Now cast off the front sts.

Continue working the back for approx 6.5 inches – end on RS row – and put all sts on holder (I kept mine on the needles since I have multiples)

Right Front:
Using new thread, cast on 47 sts (or the amount you casted off from the left front)
Work cable set-up row – mirror the cable pattern on the left front piece.
Next row (WS): work all sts in patt, increase one st at end of row. Then, increase one st at neck each row three more times, then every other row twice (same as the decreases you did for left front)
Next WS row: work all sts in pattern. Cast on 6 sts using backward loop method. Replace back sts to needles (if necessary) and join the front and back.
Work in pattern for 4.5-5.5 inches (or to your measurements).
Cast off 20 sts at the beg of next two rows so you are left with only the right sleeve sts on the needles.
Work so that the right sleeve is the same length as left sleeve and cast off all sts.


Now you will pick up sts for the back and both fronts.
Once these steps are complete, the piece needs to be blocked.

After drying, I sewed the seams up the side and sleeves. Next, I knit the collar then the button band. I did 1 x 1 rib for the collar and 2 x 2 rib for the button band.
A final blocking of the finished sweater may be necessary for the collar and button band to lie smoothly.


Encased Cable Panel (worked over 26 sts)
Row 1 (RS): p3, k3, p4, k6, p4, k3, p3
Rows 2, 4, and 6: k3, p3, k4, p6, k4, p3, k3
Row 3: p3, k3, p4, 3/3 LC, p4, k3, p3
Row 5: Rep row 1
Row 7: p3, 3/2 LC, p2, k6, p2, 2/3 RC, p3
Row 8: k5, p3, k2, p6, k2, p3, k5
Row 9: p5, 3/2 LC, 3/3 LC, 2/3 RC, p5
Row 10: k7, p12, k7
Row 11: p7, (3/3 RC) twice, p7
Row 12: Rep row 10
Row 13: p5, 2/3 RC, 3/3 LC, 3/2 LC, p5
Row 14: Rep row 8
Row 15: p3, 2/3 RC, p2, k6, p2, 3/2 LC, p3
Row 16: Rep row 2
Rep rows 1-16 for Cable Panel


2/3 RC: sl 2 sts to CN, hold in BACK, k3, p2 from CN
3/2 LC: sl 3 sts to CN, hold in FRONT, p2, k3 from CN
3/3 RC: sl 3 sts to CN, hold in BACK, k3, k3 from CN
3/3 LC: sl 2 sts to CN, hold in FRONT, k3, k3 from CN


Double Cable panel(worked over 12 sts):

Row 1, 3: knit
Row 2, 4, 6: purl
Row 5: C6B, C6F
Repeat rows 1-6 for pattern


C6B: sl 3 sts to CN, hold in BACK, k3, k3 from CN
C6F: sl 3 sts to CN, hold in FRONT, k3, k3 from CN

Please let me know if you knit this (or anything similar)!!!
By the way, I would have had this up a week ago, but my family vacationed for Thanksgiving. I'll post details (along with updates on my new project) later.

Saturday, November 15, 2008

Old Penny, Finished!

Earlier this week, I finally finished my Old Penny cardigan! I really enjoyed this project despite being paranoid that I wouldn't have enough yarn to finish. In the end, I was left with over a half a skein of yarn and I probably could have gotten away with knitting the XS. Nevertheless, its finished and I love it!


The knitting of this sweater was really only half the battle. Blocking, seaming, and finishing felt like it took just as long. Out of anything I have ever knit, this project required the most amount of finishing. That collar and button band drug on forever! But I've come to the conclusion that even though "building" the sweater takes extra time, it produces a much more professional piece. Seamless projects offer more instant gratification, but in my opinion, seams give knitted items more structure, and in the end, I am more gratified with the result.


I may still add the snaps suggested in the pattern. I am also considering using my sewing machine to add buttonholes (again, more structure than ones knitted-in IMO).

Details:

  • Yarn: Queensland Kathmandu DK, color 423, just over 7 skeins
  • Mods: Blocked and seamed all pieces before picking up stitches for the collar, added cables up the back

A few knitters pointed out on Ravelry that there are several errors in the pattern. The pattern itself is pretty vague, and from the other Vogue patterns I have read, they are NOT for the beginner knitter. I found something else that no one else mentioned about the short rows for the shawl collar. I studied the picture of the sweater on the model in the magazine, and it appears that the YO increases begin on the front of the sweater where the v-neck begins, not at the sleeves as written. This isn't that huge of a deal, except it changes the way the collar lays on the neck.

The only thing I wish I could change about it is the sleeves. No wonder they took so long to knit! They are slightly too long and too wide at the top of the arm. I believe this to be a design element, judging from the model. However, they are very comfortable and will easily accomodate another shirt underneath, making it more usable in the cold.

As I promised myself, I am busy finishing a baby blanket. She is not due until the beginning of December, but several circumstances have led the doctors to plan a C-section for the 24th of the month. Just over a week left to finish! I'll be done.

I am also very excited to announce that I am currently writing up a tutorial for the September Sweater. So many people on Ravelry have asked for a pattern. I really didn't want to go through the time and stress of a bonafide pattern, but I am giving detailed instructions and notes regarding the construction. You guys won't believe how easy it is! Hopefully I will be ready to share the .pdf by mid-week.

Tuesday, February 19, 2008

I got a new camera - YIPPIEEEE!!

After about two weeks worth of research and reading through reviews online, I finally made the big decision today about my new camera! And I am stoked! I bought a Canon PowerShot S5 IS. I am in loooooove. It's my first "advanced" digital and I'm still learning, but she does all kinds of neat tricks. Best of all, I can take pictures of myself while looking at myself! No more guessing!


Since I have no brilliant recent FOs, I decided to revisit my Cropped Sweater Jacket shoot. Those old pics really did it no justice. I guess I had this sweater on the brain since my blogger buddy soknitpicky recently finished her version of this cute coat. She did such a great job too!


Yay! I still need to practice with it. I took these quickies using the self-timer. But I am definitely looking forward to many great pics with my new baby!


Thursday, September 27, 2007

A few things that actually got finished!

Raise your hand if you have ever started a project and not finished! Me! Well, this summer, as I have said, I actually did finish a few things. Let me first say that there's not a whole lot of options for wearable items for the pregnant chick out there. (Book idea, anyone??!)

Speaking of books, I must sing the praises of Fitted Knits, by Stefanie Japel. This book is right up my alley. As the weather gets cooler and I get my body back, I definitely plan on knitting more from this book. I immediately fell in love with the simplicity of the two-toned shrug. Here's my version:


I used Berroco's Bonsai. It feels brilliant next to your skin, even in the heat and humidity of the summer. The yarn actually feels cool to the touch. Therefore, I wouldn't recommend knitting fall or winter sweaters with it, but I would definitely knit with this again. In this close-up, you can see the sheen of the yarn. I love how the collar stands up too.

Where I work, my office is about the level of atmospheric comfort of a refrigerator! So, knitting a cute little cardigan was not only fun, but necessary. Cropped cardigans of different shapes and designs can be found in abundance on the net. I really just wanted to knit something easy, with a little bit of shape, in a washable, affordable yarn.
Let me introduce Terra:


She is much cuter on, but it's pretty difficult to get your five-year-old son to take a good picture! The hubby is on the night shift, which is about the only time I think to pull out the digital camera. Anyway, I'm going to call this my own design, because I pulled ideas from a few different patterns and threw my own spin on it. I know it's pretty rudimentary, but it serves it's purpose well. Terra was knit from Lion Brand's Cotton Ease, in Terra Cotta. Hence, the name. I used between 2-3 balls. The ribbed edging was done on 4.5mm circs and the rest on 5.0mm circs. If I knitted this again, I'd add more buttons, but I think it's fine the way it is.

Here's a detail shot:


I've got two more sweaters in the works right now. I also still need to start Oliver's blankie. He's still in the factory if you know what I mean. I only have about a month before he comes so I need to get rolling with it. I made him a pair of Saartje's Booties. Pattern here: http://www.saartjeknits.nl/ I still need to attatch buttons before I post a FO pic, but here's what they look like now:


I've been having an affair with the color orange lately. I've seen way cuter versions of these out there, but I really wanted to use this wool/microfibre blend I've had for a while. I'll make him a couple more pairs I'm sure.
Anyway, that's enough for now. I shall be updating soon on my sweaters. I'll keep them a surprise!
Laters!


Wednesday, September 26, 2007

A Summer of Knitting!

Here's my Lelah!


I have been quite busy this summer knitting this and that. I was so happy to find an ample amount of knitters on the net who apparently are as obsessed with knitting as I am. (Thank you, http://www.craftster.org/)!


This top, which is an adaptation of a pattern called Lelah, actually fits over my pregnant belly! My version uses a different lace pattern, old fern, instead of the fishtail lace. I added i-cord for straps and drawstring and several rows of stockingette stitch at the bottom to create a fitted blousing effect around my waist. I decided against using elastic around the top of the bust, because I wasn't sure how my sizing in that department would change after the pregnancy. I'm really hoping my plan of creating something I can wear after the baby comes will work out. We'll have to see about that. I don't have any "action" shots of this top yet, but hopefully we'll get around to taking some in the future.


Pattern for the original Lelah can be found on this blog: http://www.knittingforboozehags.com/!


Here's a detail shot. I used Lion Brand Cotton Ease in Lake, approx 2.5 balls.